
Global tactics library
Offensive Zone Possession
16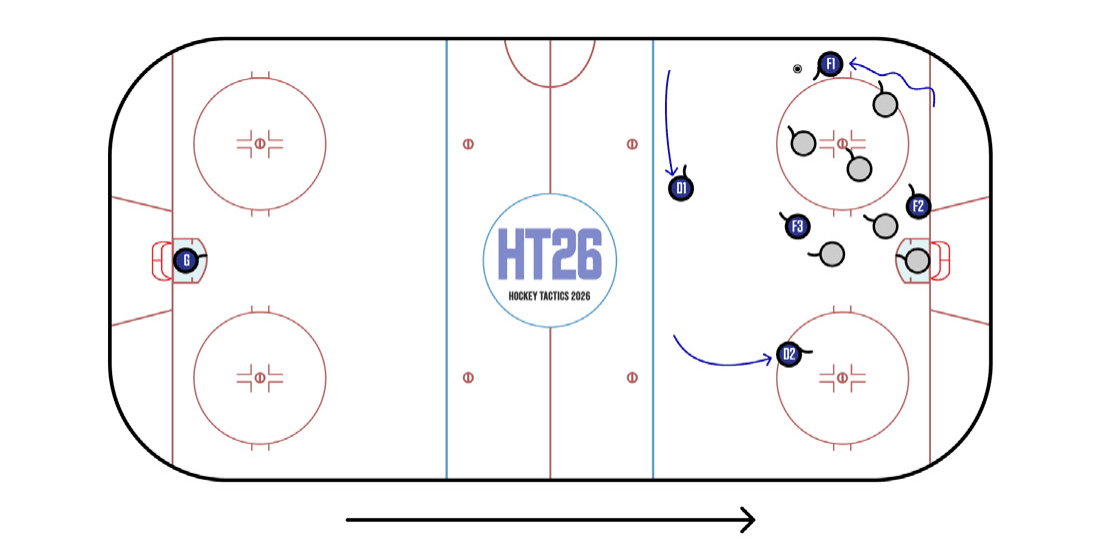
The 1-3-1 is ubiquitous at 5v4 but seldom-seen at 5v5. As F1 carries up the wall, D1 slides across the blue line and D2 attacks down. This movement creates passing options against a passive zone defense, but also exposes the attackers to an odd-man rush against if D1 misplays the puck at the top of the umbrella.
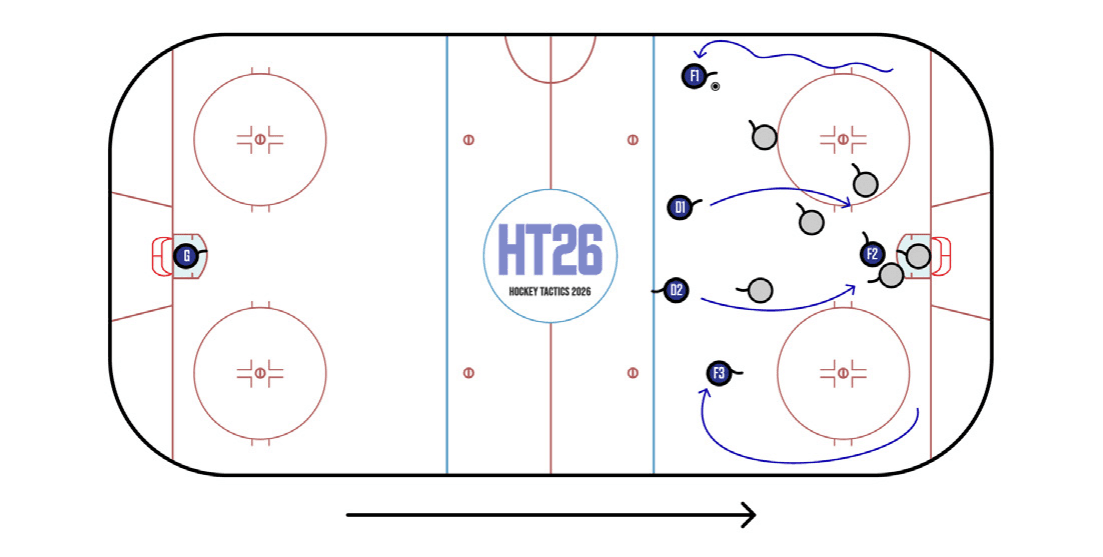
The 1-4 OZP is hockey’s answer to Total Football. One skater (F2) holds the net front to attract defensive attention while the other four curl up and funnel sequentially through the slot. This creates a series of mini rushes that catch zone defenders flat-footed and force man-on-man defenders to over-extend. Once at the net, attackers keep their speed and reload to the blue line to stay above a potential counter-attack.
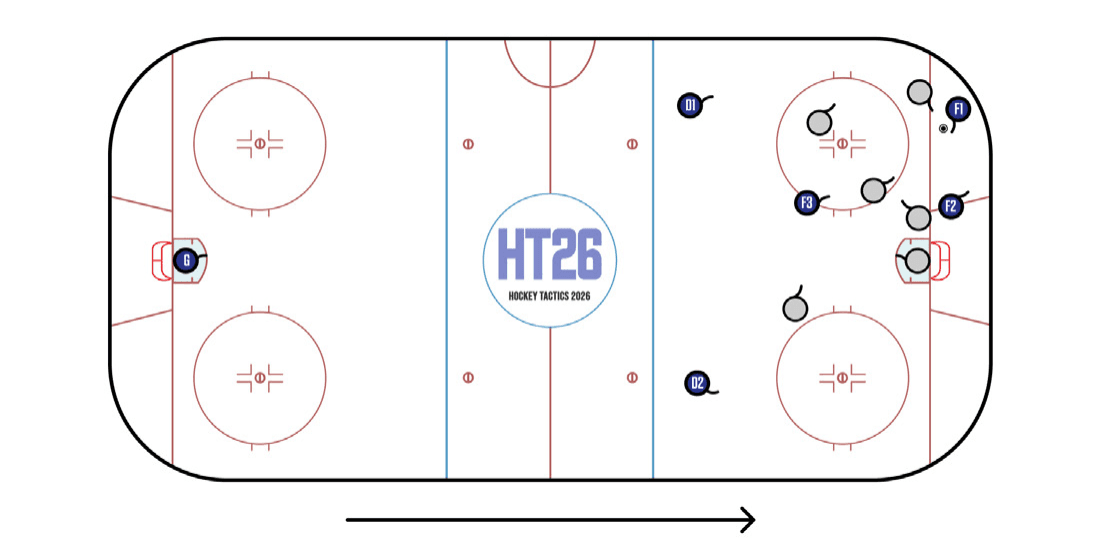
The 2-1-2 is our sport’s standard OZ formation. As F1 emerges from the corner with the puck, F2 may either stay on the strong side (the same side as the puck carrier) or fade toward the opposite corner. F3’s job is two-fold: get open between defenders and create a slot threat, and stay above the opposing team’s third player in case of a counter-attack.
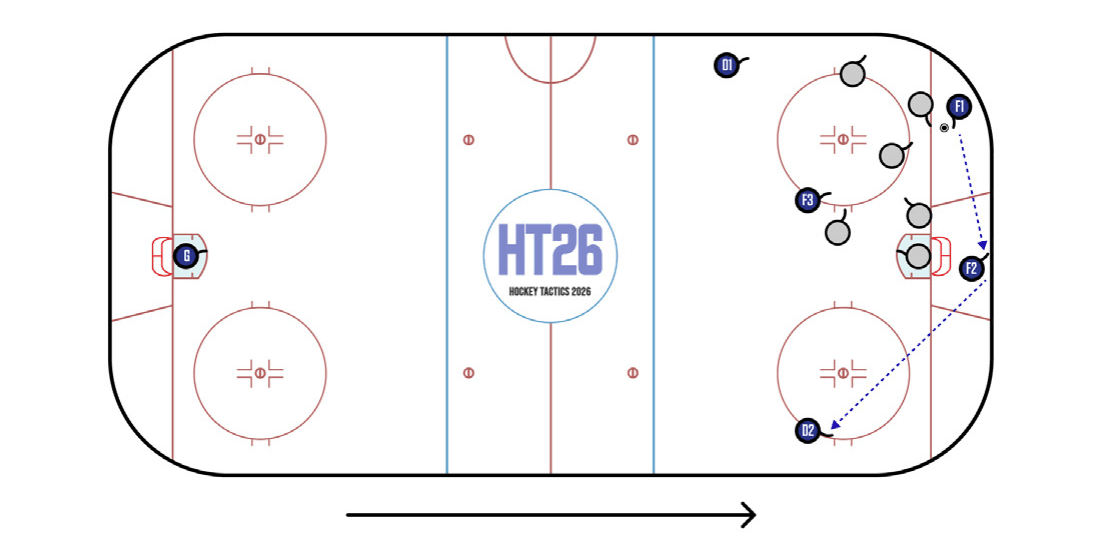
Basic principle: expand on offense. If F1 finds F2 behind the net, D2 (the weak-side defenseman) can sneak down the boards to become a passing option as all five opponents react to the change of side.
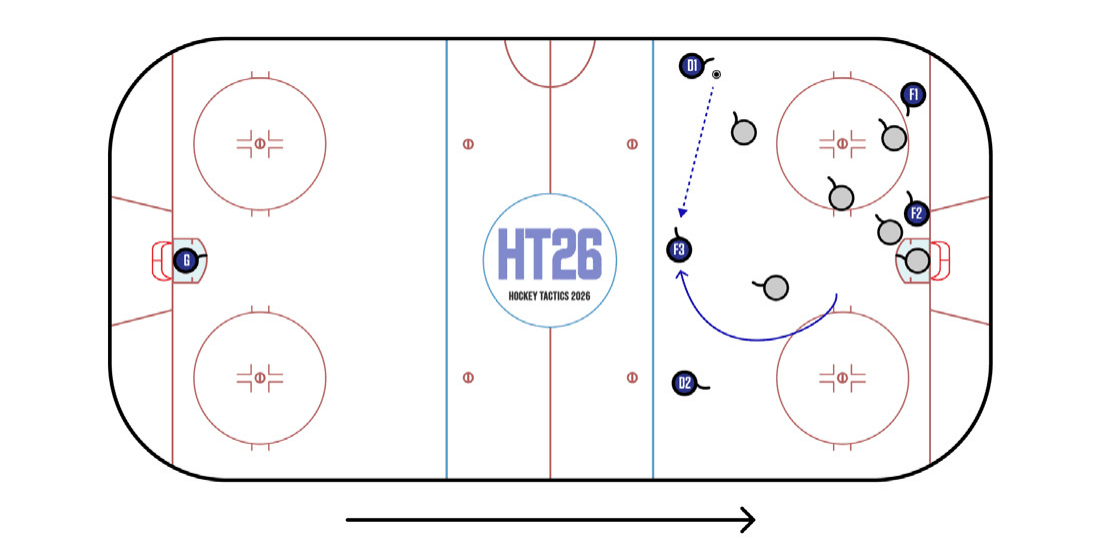
An important innovation in hockey tactics is the adoption of the 2-3. By inverting the old-fashioned Spread, skilled attackers can set up a High 3v2 and attack downhill. Rebounds and loose pucks typically wind up in the opposite corner, forcing defenders to turn their feet and neutering their counter-attack potential.
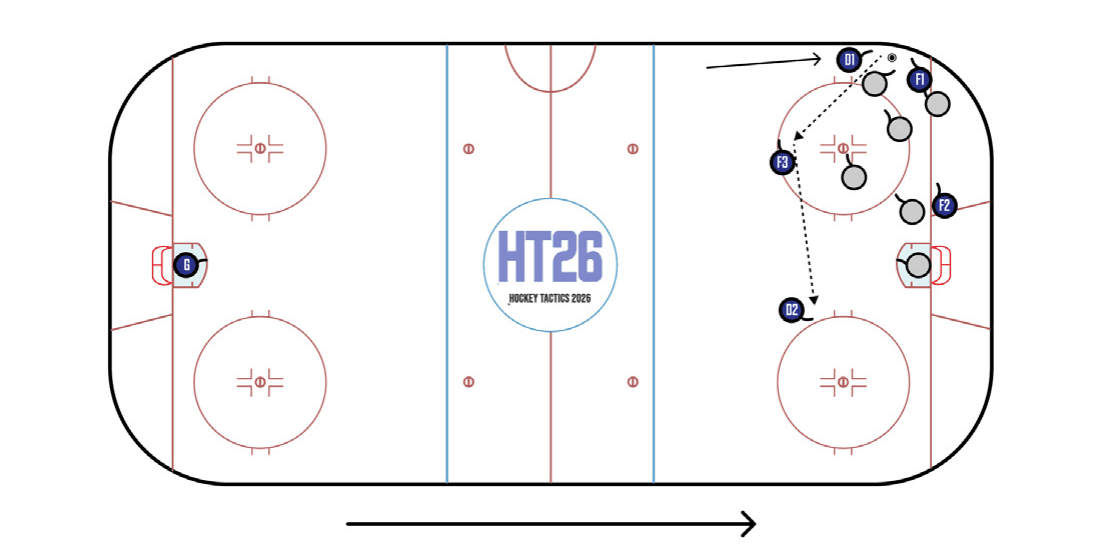
Basic principle: contract on defense. If F1 is in danger of losing a corner battle, the three high players short the zone and sit atop opposing forwards to pre-emptively deny the breakout. This proactive defensive play forces the opposing team to either flip the puck out for F3 to retrieve, or bump it to the opposing corner against D2’s pinch.
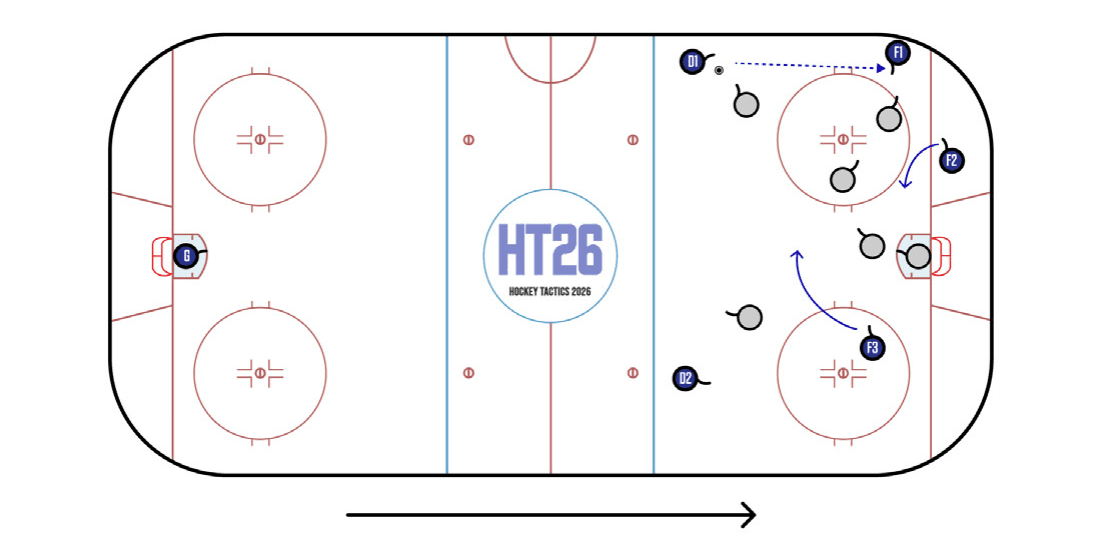
If defenders are slow to react to a Low to High pass, the attacking team can create an advantage by immediately going High to Low. As F1 receives the puck, F2 and F3 skate behind defenders to create high-danger catch-and-shoot opportunities.
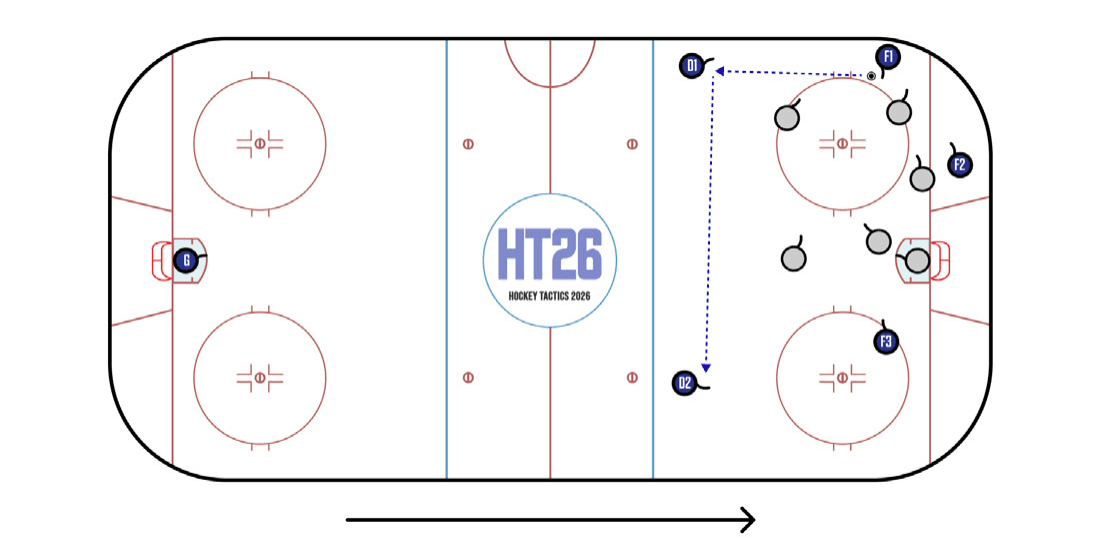
NHL teams defend low plays with all five skaters overloading the area around the puck. The Low to High is a conservative play that teams use to maintain possession. F1 moves the puck to D1 in order to create time and space. F3 vacates the slot and moves into open ice in the opposite corner to stretch the defensive structure.
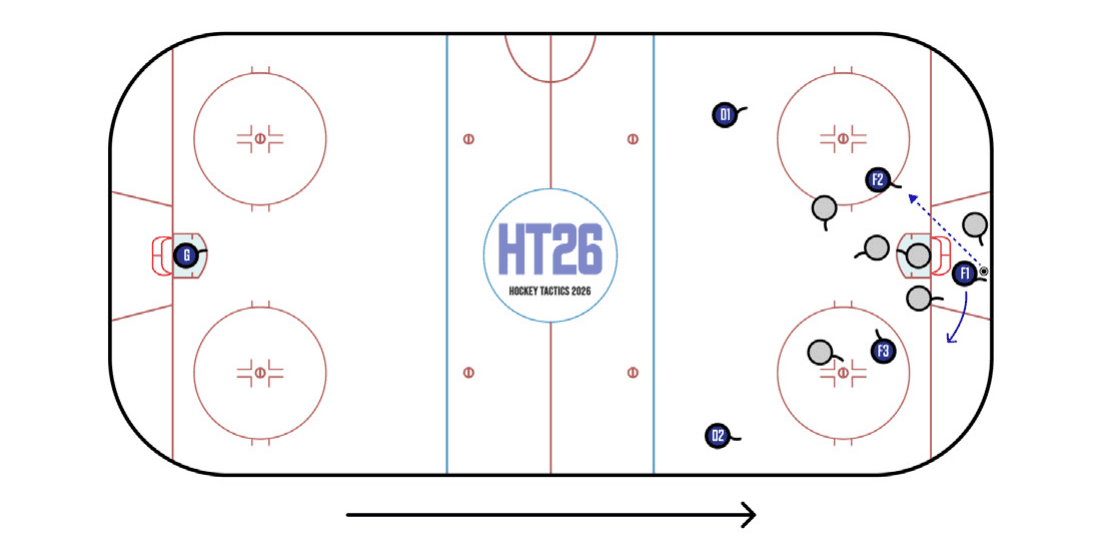
The Polgz goal is a trick play whereby the puck carrier threatens a forehand wrap-around but instead makes a behind-the-back backhand pass to surprise opposing players. Behind-the-net plays have a high conversion rate against disorganized defenses, but may result in dangerous rushes against when misused, as the puck is essentially being passed toward one’s own net.
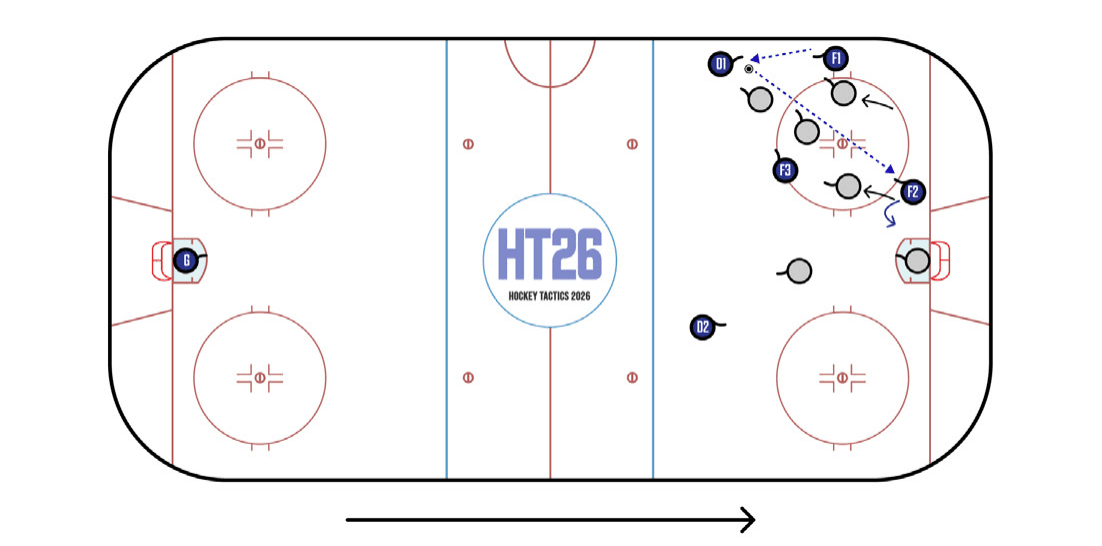
Creating offense means mastering both space (landing at the right spots relative to others) and time (knowing when to stay and when to skate). If the attacking team is able to quickly contest a counter-attack, then there is advantage in F2 delaying their backcheck and hanging out momentarily in the space vacated by opposing defensemen, who are sprinting to join the developing rush. Aggressive early defending by D1, F1 and F3 may well create a mini-breakaway for F2.
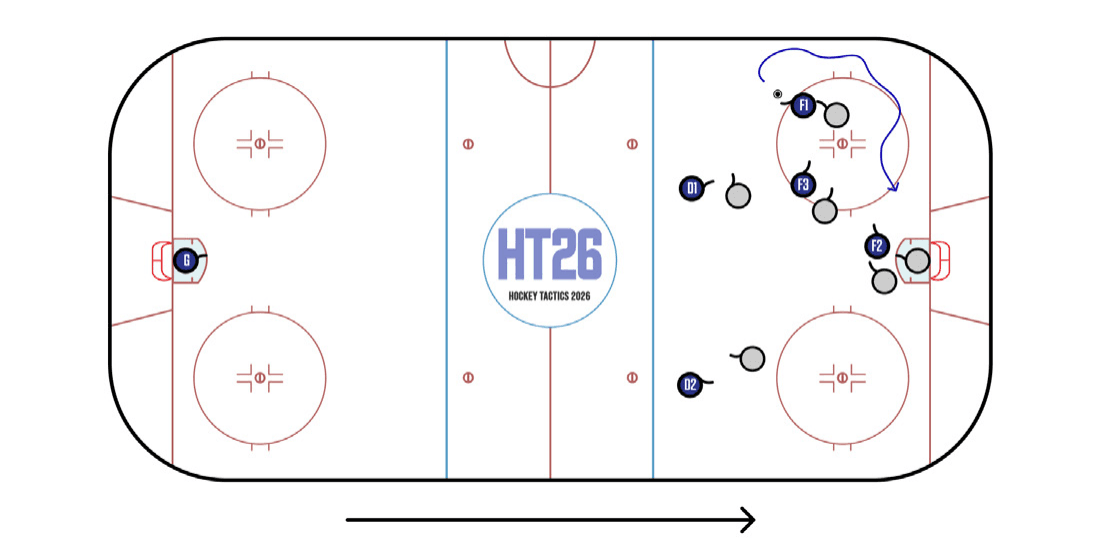
The High Cutback is a powerful tool against aggressive man-on-man defending. F1 draws in the nearest defender and skates away from the net while staying off the wall. With the defender within touching distance, F1 cuts back and is rewarded with a clear path to goal.
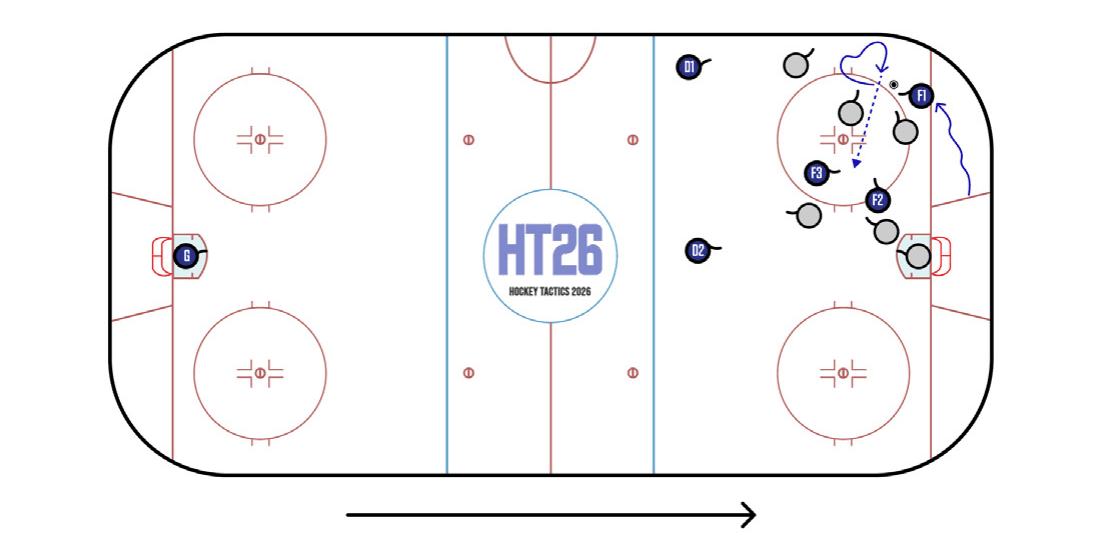
The Low Cutback is most effective against an overloading (Five Tight) defensive structure that plays 5v3 in one quadrant. The setup is similar to the High Cutback, except F1 will likely not have a lane to the net coming out of the turn. Instead, the ideal play is to make a slip pass to F3 or F2 in the high-danger slot area.
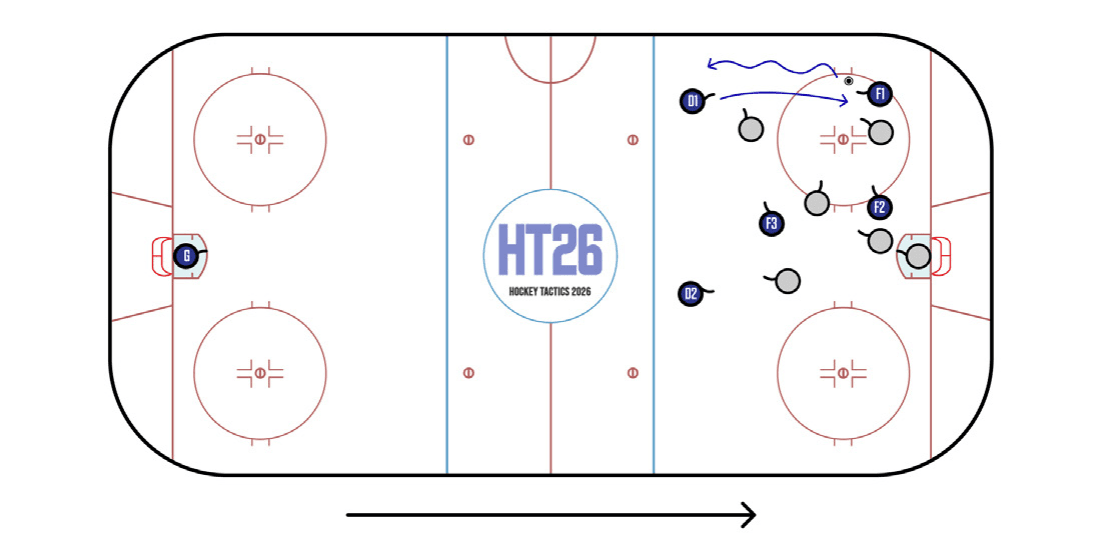
OZP player and puck movement challenge defensive structures by forcing individuals into decisions. As D1 and F1 cross, the two nearest defenders must either mirror the attackers’ movement or stand their ground and hand off coverage to each other. A poor (or late) decision leads to an offensive opportunity.
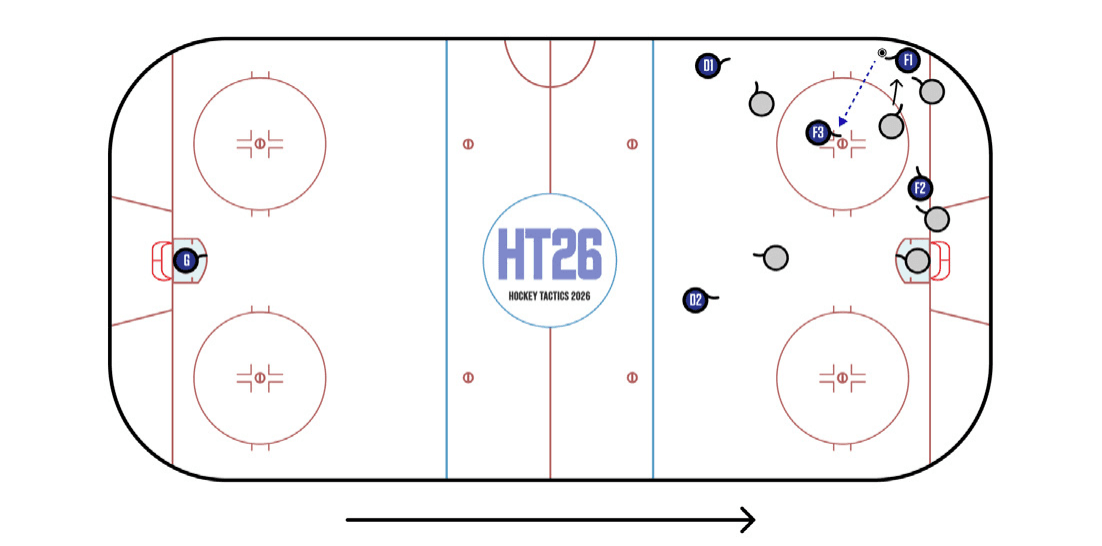
A Five Tight defense offers solutions against many OZ plays, but it struggles to neutralize the short pass from F1 in the corner to F3 atop the strong-side faceoff dot. The low forward or the strong-side winger could shift over to cover F3, but that would open up other options for F1 to exploit.
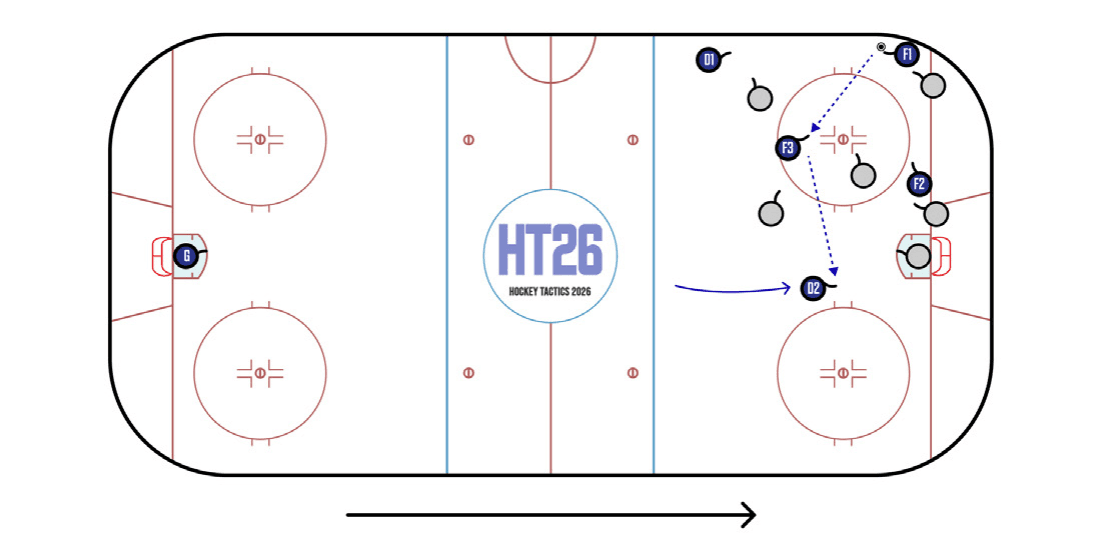
F3 only has a split-second with the puck on a Dot Support play before multiple defenders converge. An active D2 creates a follow-up play by sprinting down the weak side and calling for a pass. D2’s credible scoring threat may force defensive forwards to give more space to F3 the next time around.
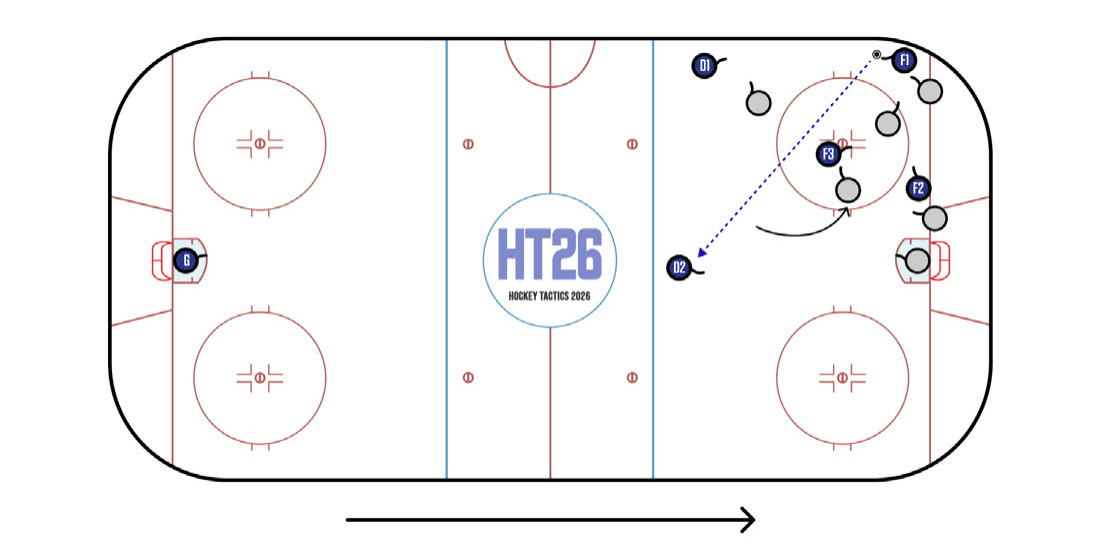
If the opposing weak-side forward collapses to cover F3 at the strong-side dot, F1 can exploit the passing lane between the corner and the weak-side defenseman. A long diagonal pass forces the defensive structure to shift horizontally and vertically, potentially creating mismatches.