
Global tactics library
Neutral Zone Regroup
6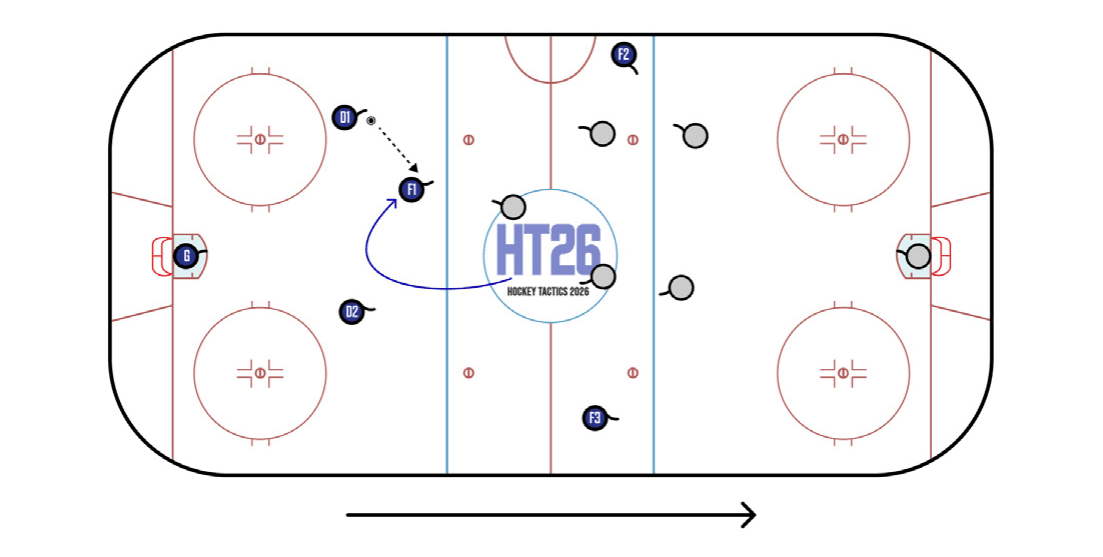
Instead of making a Right Up, D1 can delay and find F1 circling back for a pass reception in the middle. The Center Low play is less likely to catch opposing players off-guard, but gives high-end puck carriers an opportunity to leverage their strength against a flat-footed defense.
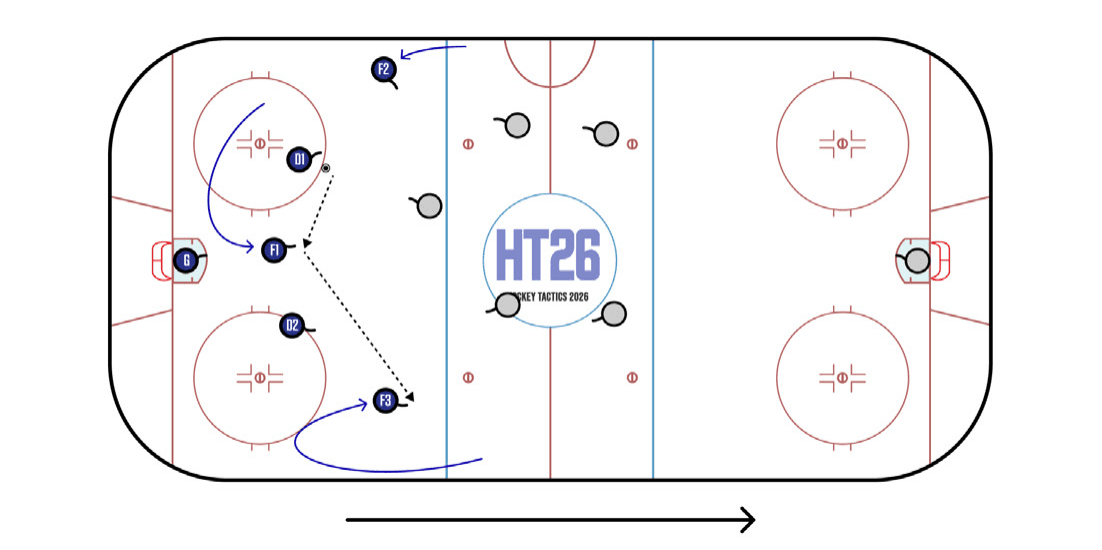
Widely adopted by European pro leagues, the Five Back regroup calls for Fs to swing back toward the defensive zone to support the Ds. All five skaters then build speed and attack the neutral zone using short lateral passes to pick the defensive structure apart. This regroup is unpopular in the NHL, as teams prefer to station Fs at the far blue line to create quick-strike opportunities.
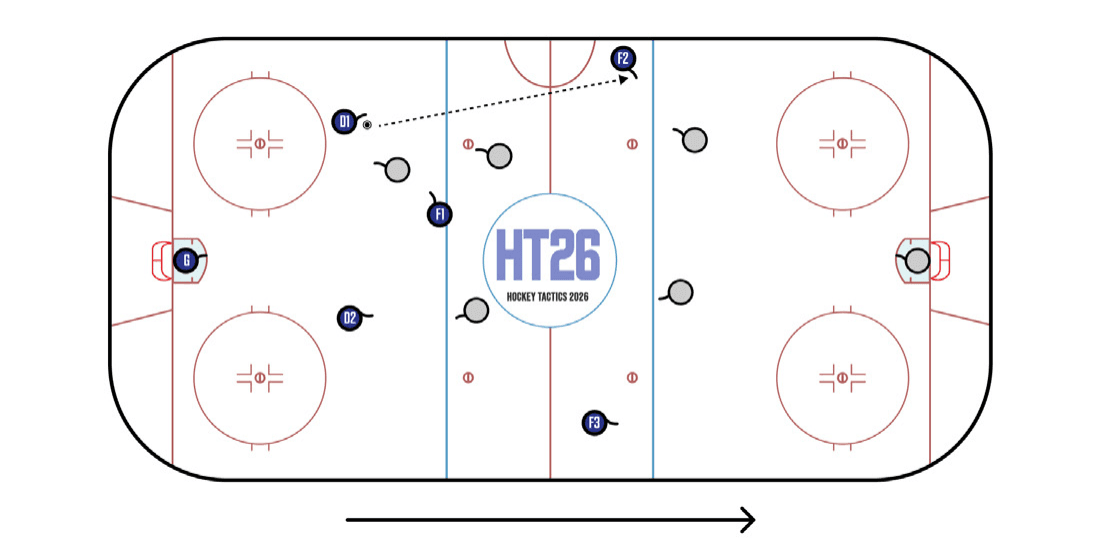
A typical regroup starts in a 2-1-2 formation with the Ds back, a low forward (usually the center) in support and both wingers stretching toward the offensive blue line. Against a 1-2-2 NZ forecheck, a timely Right Up play bypasses opposing forwards and creates a wide 1v1 between F2 and an opposing defenseman. The Right Up is a simple play, but one that can easily result in an icing or a turnover if the vertical pass fails to connect.
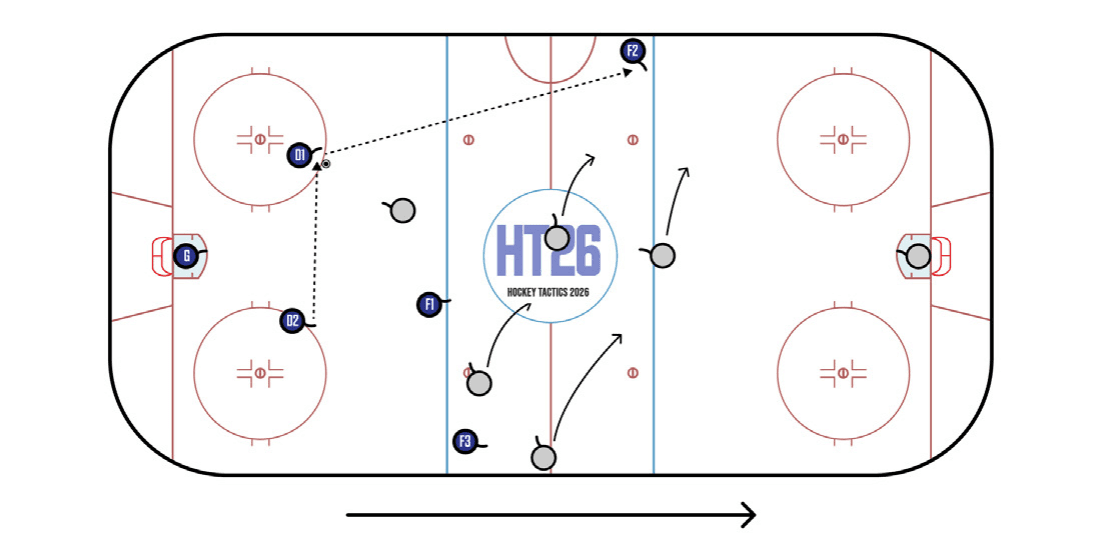
The second period long change creates an opportunity to catch opponents off-guard on a regroup. As the defending team makes a line change, the attacking team moves the puck to the opposite side and uses a Right Up to create an uncontested wide entry. As defenders sprint across to challenge F2, F1 and F3 sneak by to create an odd-man situation at the net.
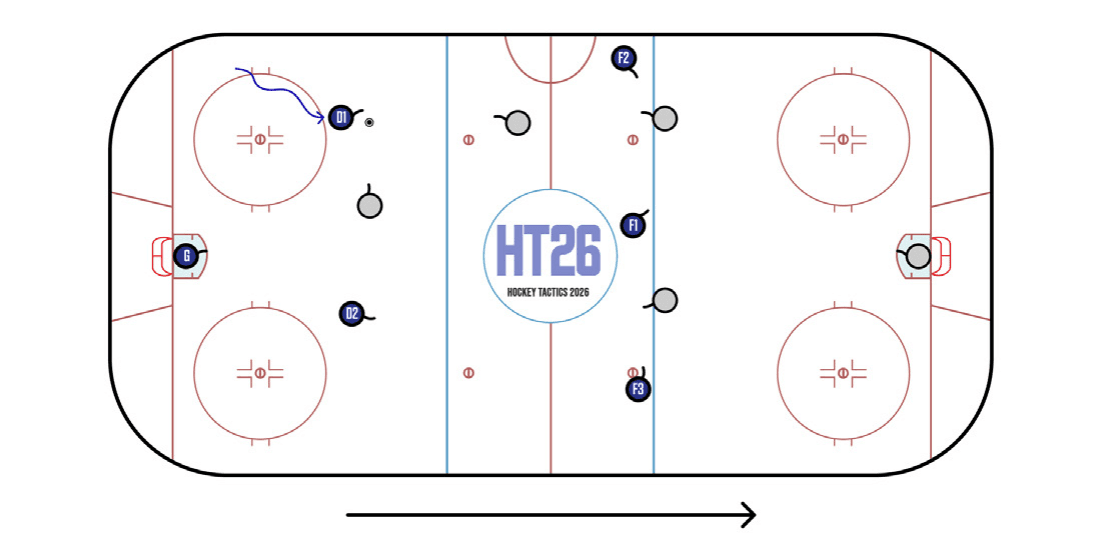
Popular among high-level teams, the Three High is a double-edged sword. By sending all of its forwards to the far blue line, the offensive team pushes opposing Ds back and can create an immediate 3v2 rush with an accurate stretch pass. When poorly executed, the Three High leads to unrecoverable dump-ins and dangerous counter-attacks, as Ds and Fs struggle to close the wide gap between them.
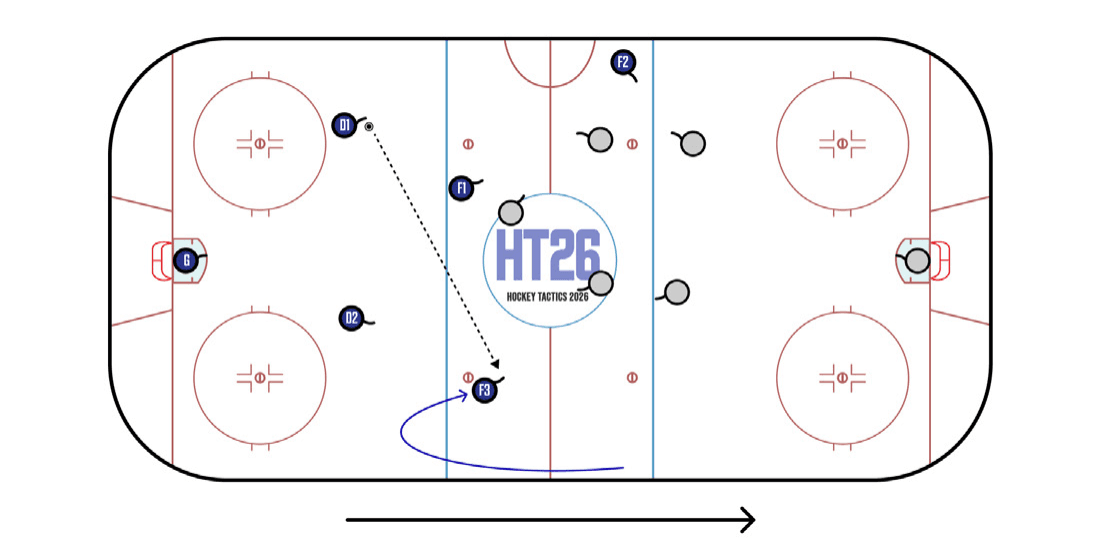
The Weak-Side Winger Low is an effective play for forwards with tremendous outside speed. The F1/center acts as a decoy in the middle while D1 sends a cross-ice to F3, who’s curled back to create a flatter passing angle. This change-of-side is especially difficult to defend for NZ forechecks that overprotect the middle, as shown above.