
Global tactics library
Neutral Zone Forecheck
10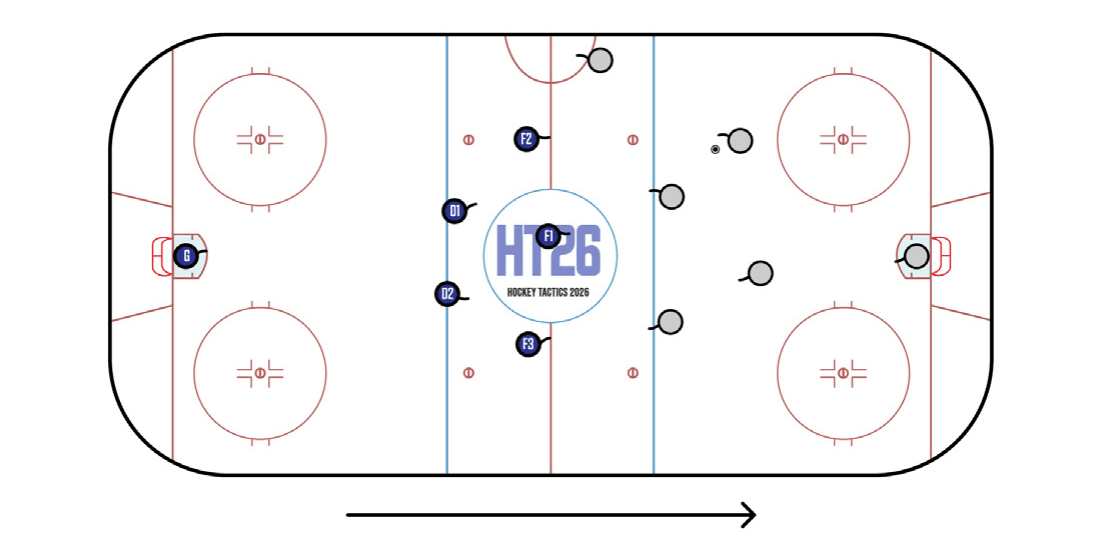
The most passive neutral-zone scheme is the 0-5, with all five skaters standing in the back half of the NZ. No defensive player makes any attempt to pressure the puck carrier before the red line. This type of NZ trap is often seen in Europe and is seldom effective in the NHL.
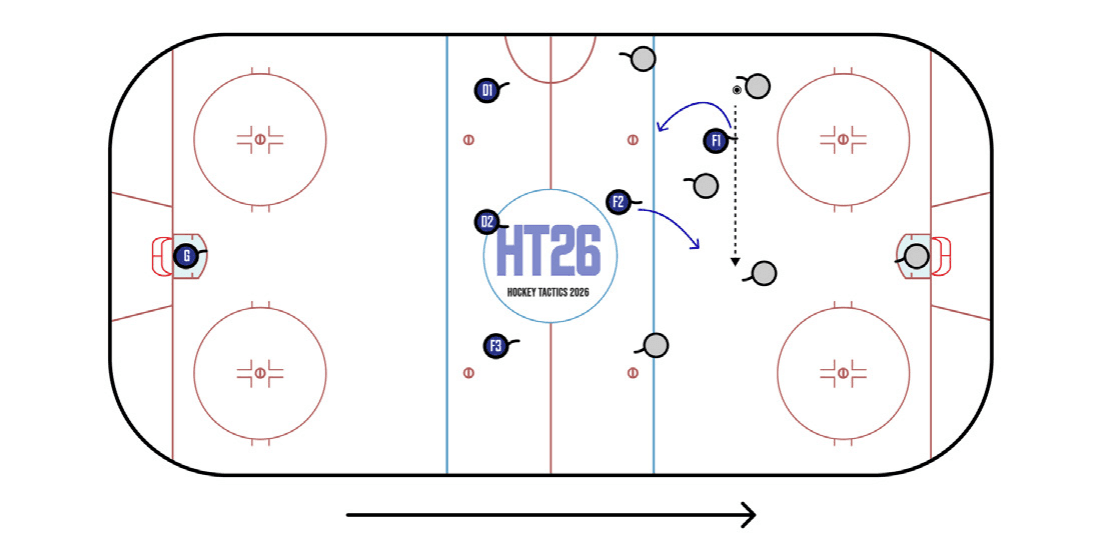
In a 1-1-3, F1 and F2 work together to disrupt the opposing regroup while D1, D2 and F3 build a wall. This somewhat passive NZ FC enjoyed a surge in popularity at the NHL level between 2019 and 2022, but the majority of teams have reverted to the 1-2-2, which does a better job of protecting the red line.
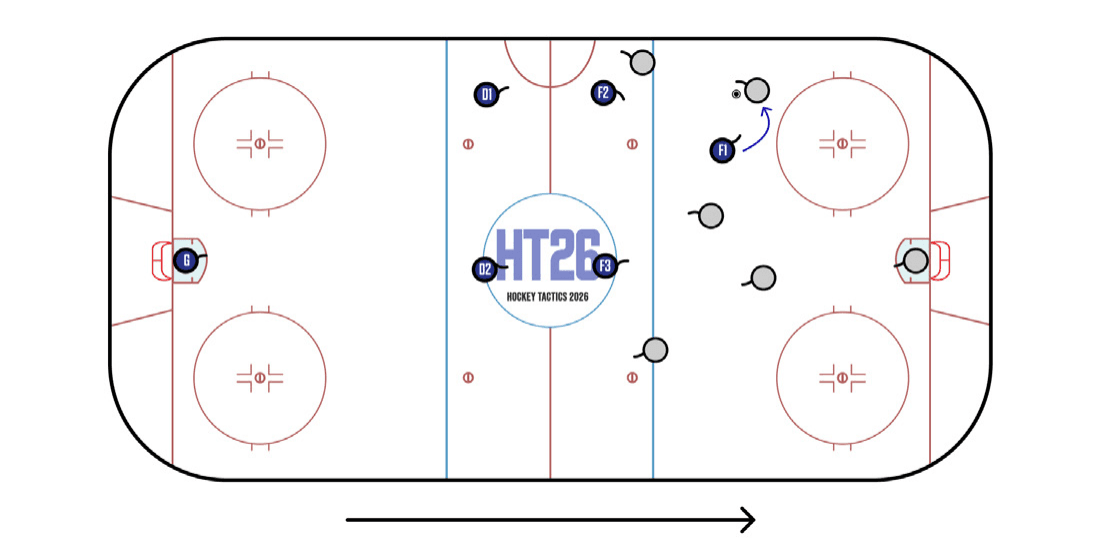
The familiar 1-2-2 remains the neutral-zone forecheck of choice from house league to the NHL. F1 influences the play toward the wall by angling the puck carrier. If successful, the play becomes a 4v3, with F2 and D1 denying the strong side and F3 staying above the middle threat.
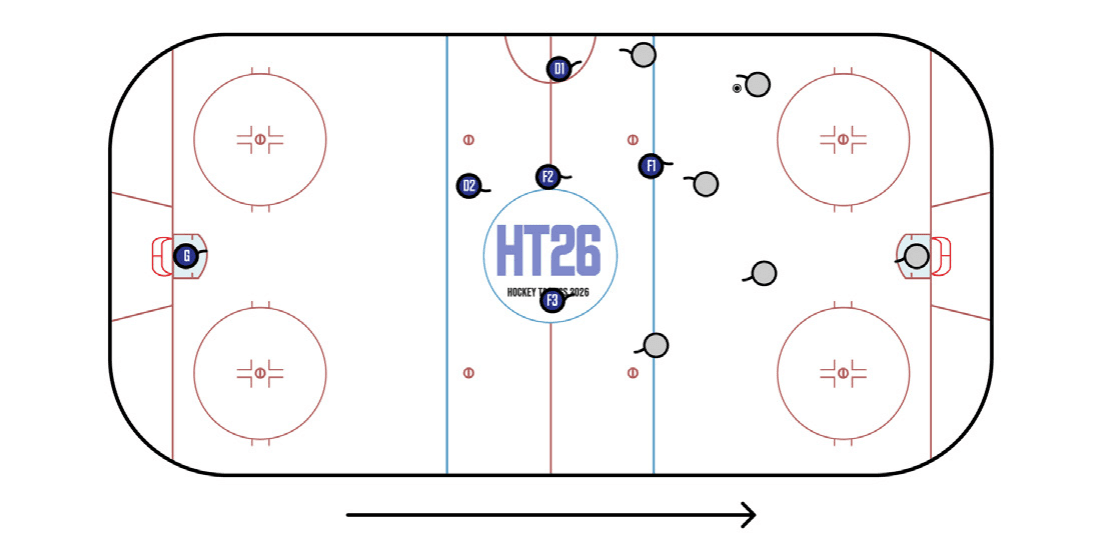
The 1-3-1 trap is the antithesis of the 2-1-2. The five defensive skaters stand in their spots in pure zone coverage, daring the opposition to make a risky carry across the neutral zone. If the puck is dumped in, D2, the last man back, has a head start on the retrieval.
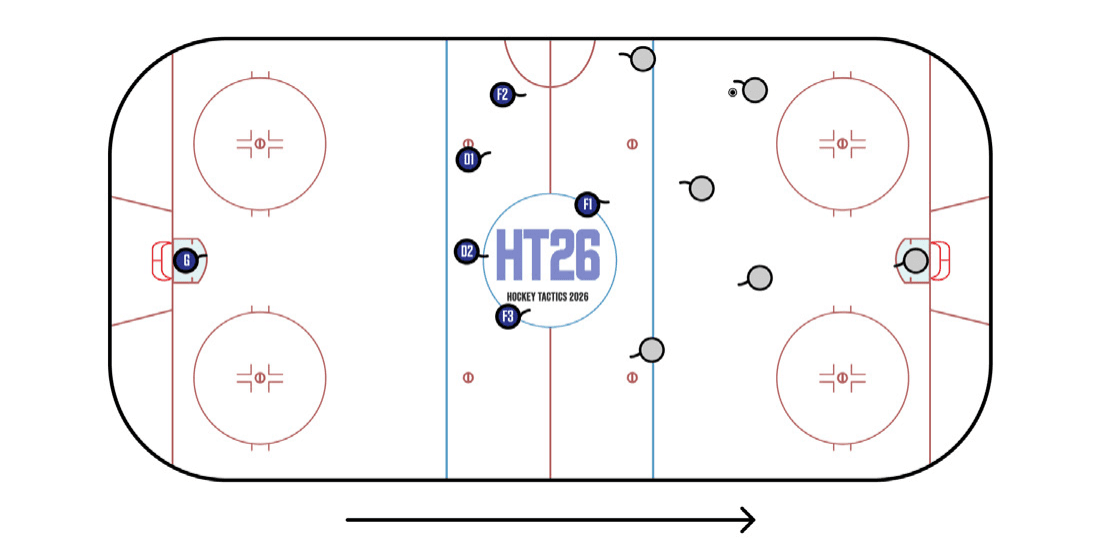
The 1-4 trap, by virtue of its similarities to the ubiquitous 1-2-2, is easier to teach and easier to deploy. However, it is vulnerable against strong forechecking teams that only need access to the red line to wreak havoc, as well as skilled players who can dangle through multiple flat-footed opponents at the offensive blue line.
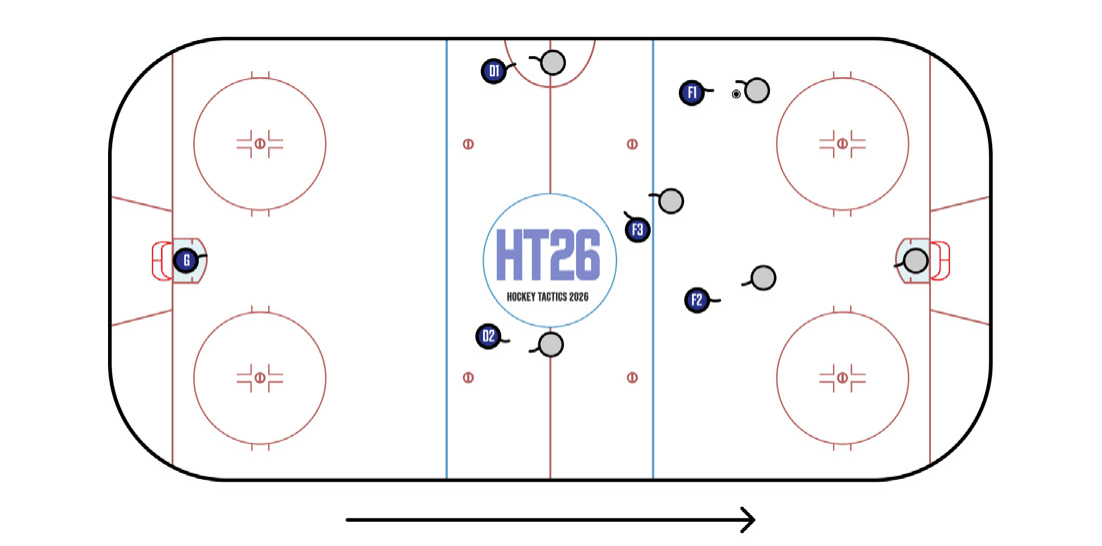
The 2-1-2 is essentially man-on-man coverage, with wingers (F1 and F2) pressuring opposing defensemen, the center (F3) staying above his counterpart and Ds gapping up early against opposing wingers. Man coverage breaks down unless everyone is fast and fit enough to hit their marks, so the 2-1-2 is most often seen following NZ faceoff losses, rather than in open play.
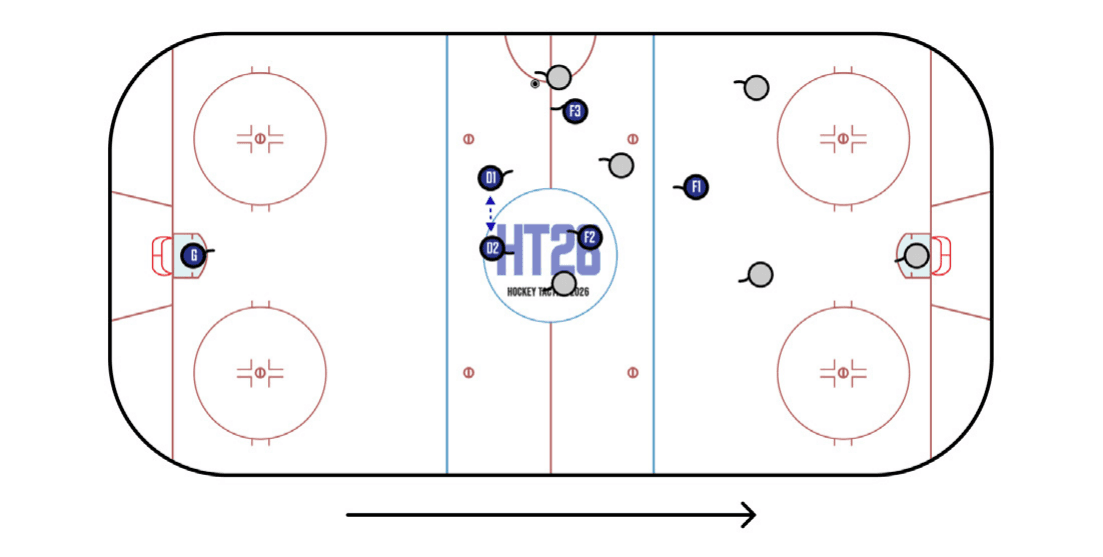
Defensemen in a 1-2-2 NZ FC typically look to play a tight gap and cut off wide carries near the red line. If this is not possible, D1 and D2 tighten up to create the illusion that they will not contest a wide controlled entry. Once the puck carrier commits to straight-lining outside the dot lane, D1 and D2 can either protect the middle and wait for F3 to catch up to the puck carrier, or surf out aggressively to force a dump-in.

Another option for F3 is to stay between D1 and D2 to form a 1-1-3. On occasion this read can help the defending team deny the entry and seamlessly transition to offense, but having the tracker split the Ds can create confusion and lead to breakdowns on the way back to the DZ.
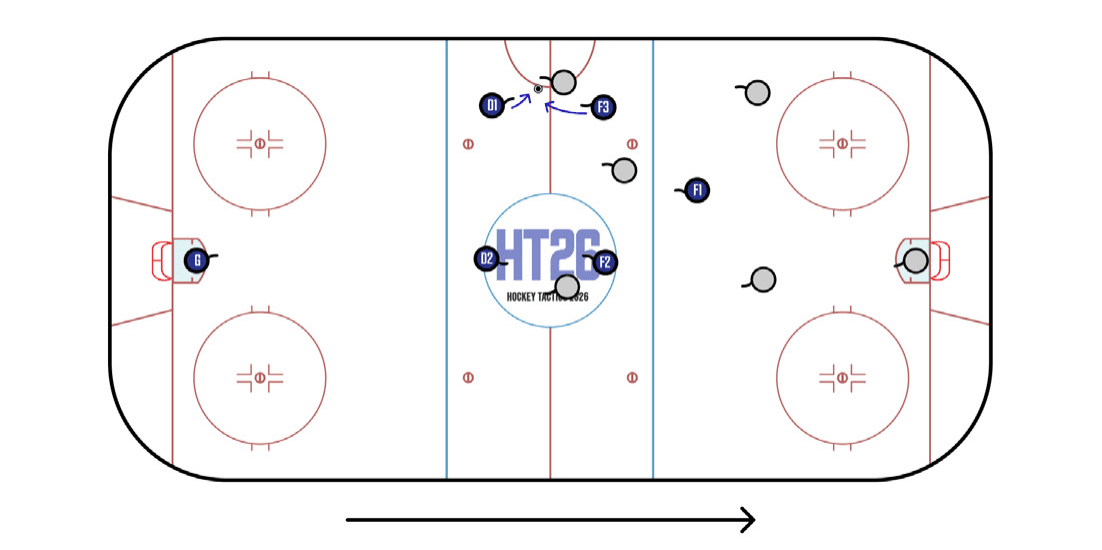
The term backchecking invokes effort and intensity, while tracking details the reads and routes players take against counter-attacks originating from the offensive zone. Tracking occurs almost exclusively in the context of a 1-2-2 or 1-1-3, as the defensive team won’t have the time to morph into another shape. In the example above, F3, the first forward back, hounds the puck carrier until the red line, allowing D1 to gap up and possibly step up to deny the entry.
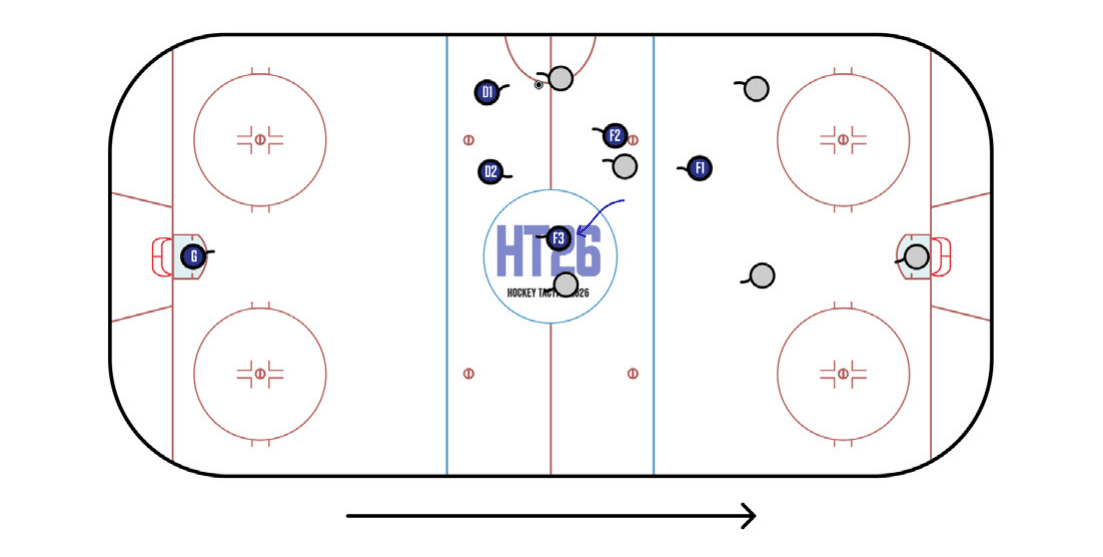
If F3 is unable to create back pressure at the red line, he can switch off from the puck carrier and re-route to get above the wide threat. This allows D1 and D2 to stay tight to each other, surf as a unit and close off strong-side entry attempts.