
Global tactics library
Defensive Zone Breakout
12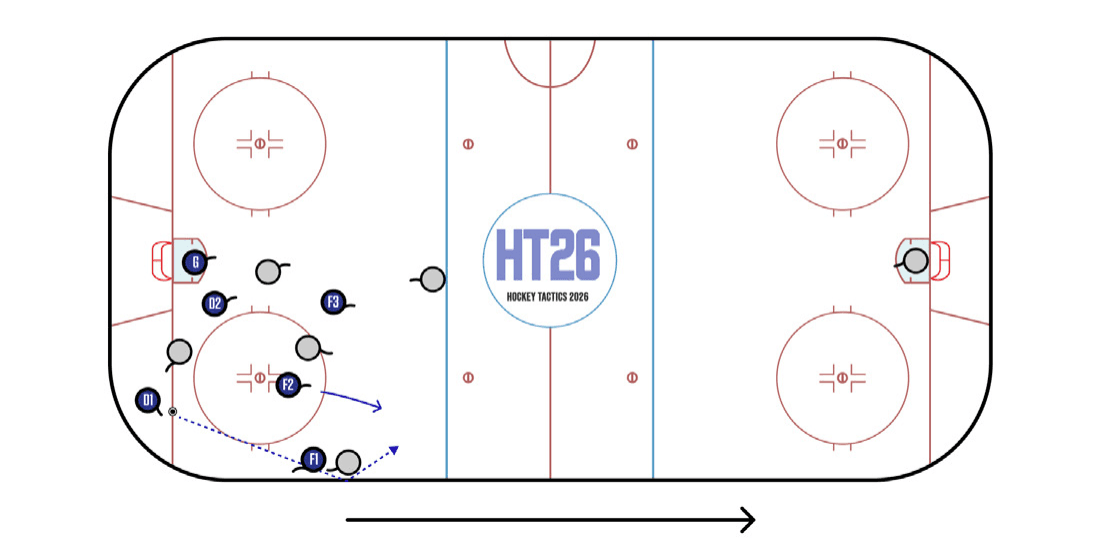
The Bump-By is a useful play against teams that systematically pinch their defensemen. F1 establishes body position, then sacrifices himself by bumping/chipping/redirecting D1’s pass through the pinching D. F2 and F3 anticipate the play and sprint past the pile for a 2v1 opportunity.
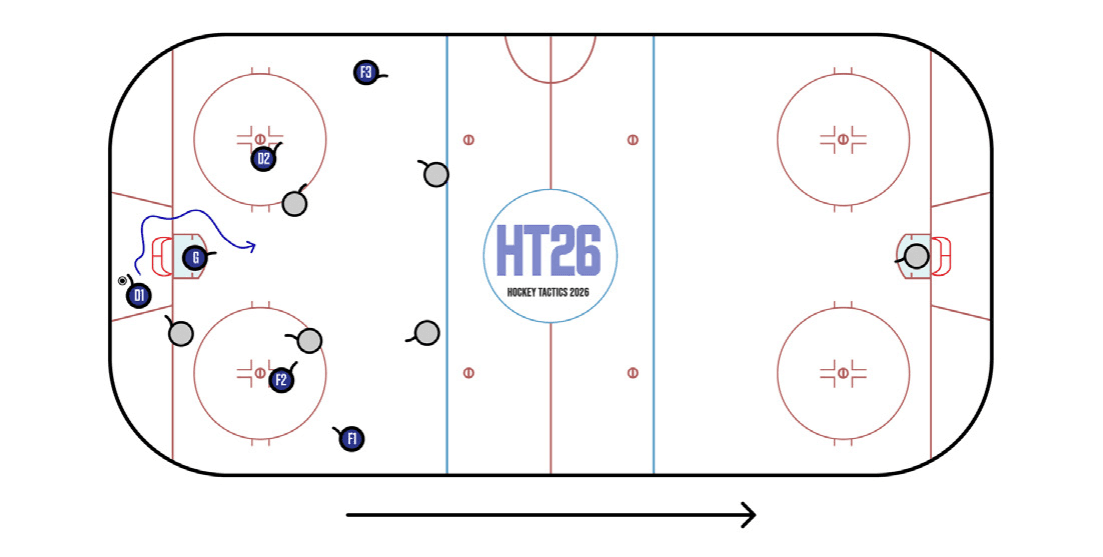
Highly skilled defensemen can create an advantage by drawing in the first forechecker, cutting the back of the net tightly and accelerating into the middle. This creates a fleeting 5v4 advantage than can be leveraged into a chance off the rush.
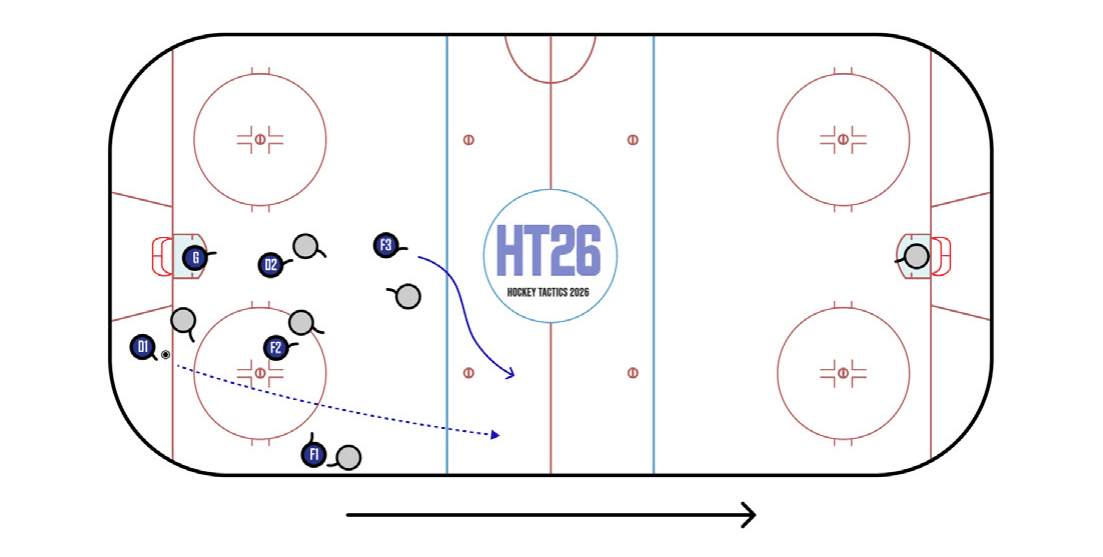
Against a perfectly executed forecheck, the puck carrier may have no choice but to lob the puck out of the defensive zone. Punting the puck is preferable to making a defensive-zone turnover, but it is still a negative outcome unless F3 can get to the loose puck first.
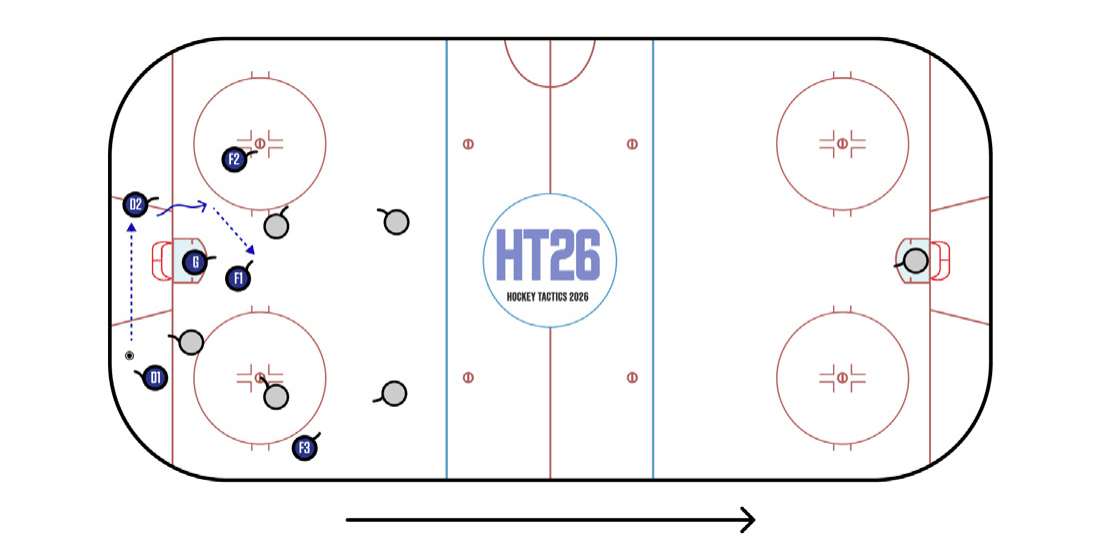
On a D-to-D pass behind the net, the center (or the first forward back into the zone) swings low to open a passing option in the middle. D2 and F1 work together to play off the nearest forechecker’s heels. F1 must scan the ice before and after reception, while being careful not to mishandle the puck and give up a high-danger chance against.
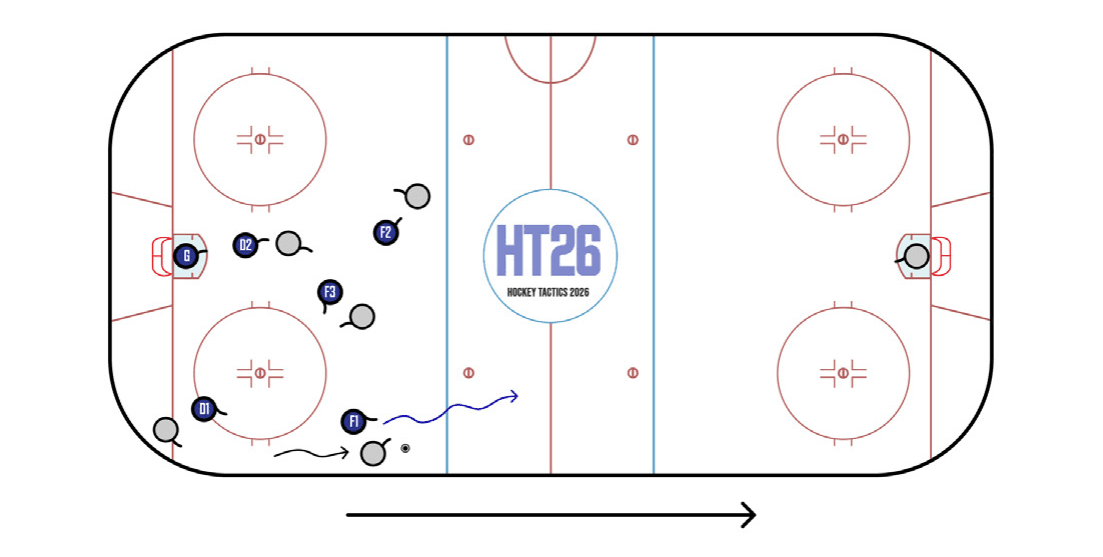
Counter-attacks out of man-on-man coverage are usually initiated by a 1v1 battle won near the blue line. F1 attaches to puck carrier, forces him up the wall and steals the puck for a breakaway opportunity. Note that F2 and F3 are less likely to join the rush in this scenario, as they’ve already turned their feet toward their net in order to stay with their checks.
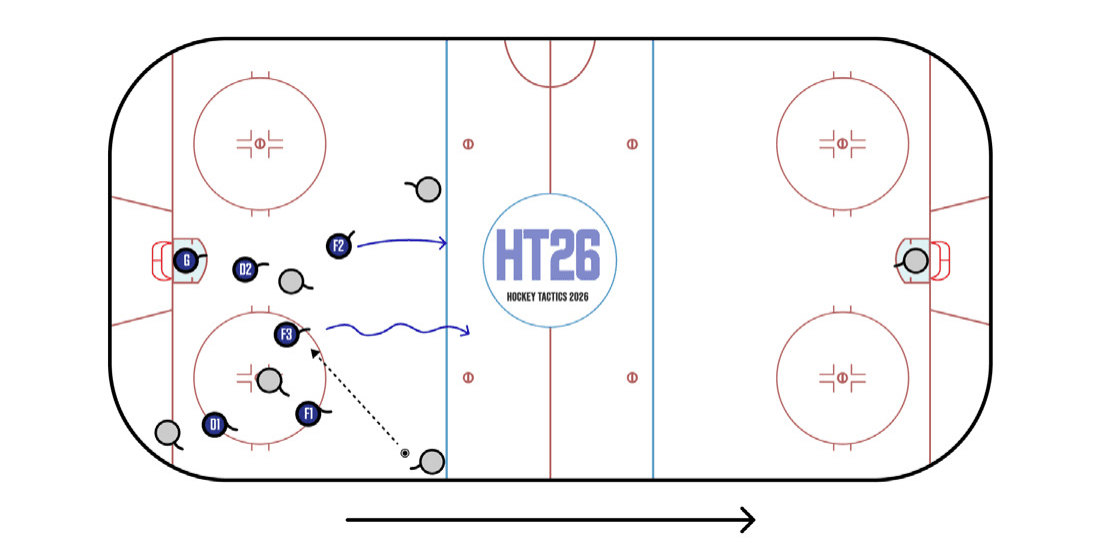
Counter-attacks out of zonal coverage are usually initiated by a shot block or an interception. F3 gets in the way or moves pre-emptively to pick off a centering attempt. F2 accelerates past the flat-footed weak-side defenseman.
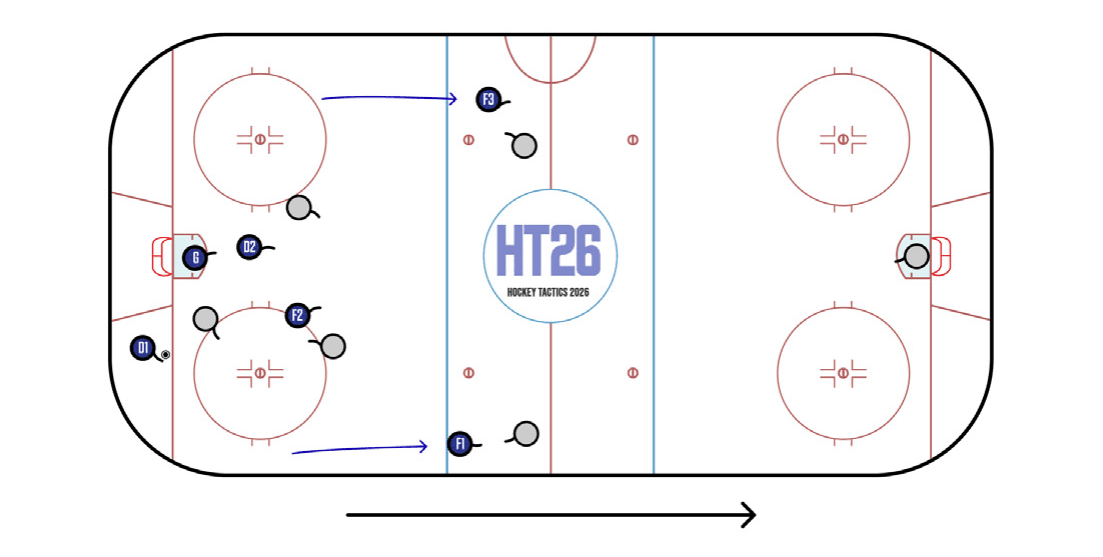
As the blue team regains possession, two forwards fly the zone to create a 3v3 underneath. Push on Possession creates offensive opportunities for both teams, as a failed exit can quickly degenerate into an odd-man situation near the net.
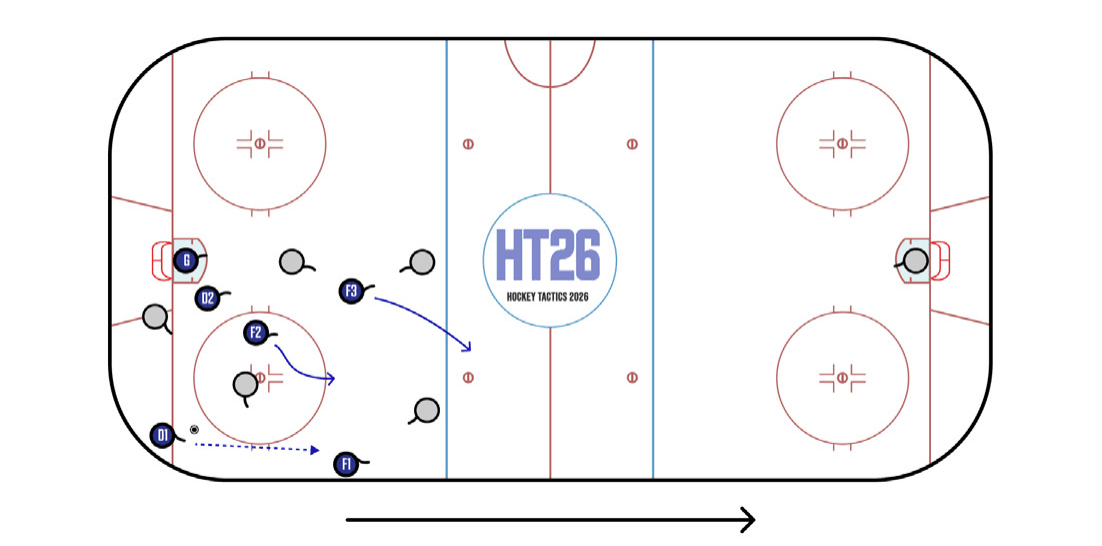
D1 plays the puck up to F1 on the strong side. F2 supports the play along the dot lane. F3 sprints middle or between opposing Ds. D2 stays back in case of a turnover. Forcing the play up the strong side is an effective tactic for teams with heavy, fast wingers, but this scheme’s predictability handcuffs players who are most effective when exploiting the width of the ice.
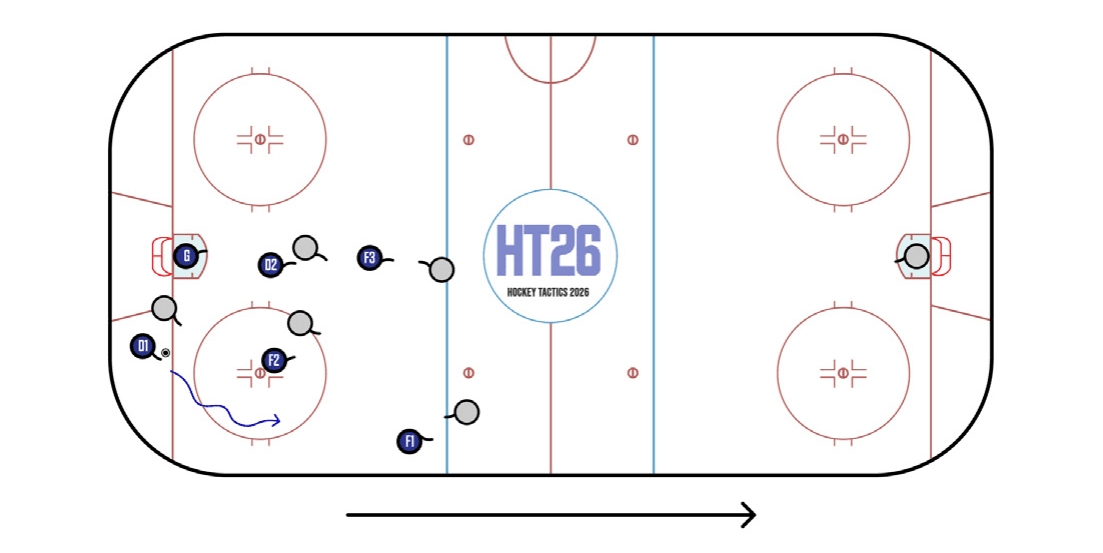
Similar to Close Support, except F1 leaves the zone early in order to prevent the opposing defenseman from pinching. This creates more space for D1 to carry the puck out of the zone.
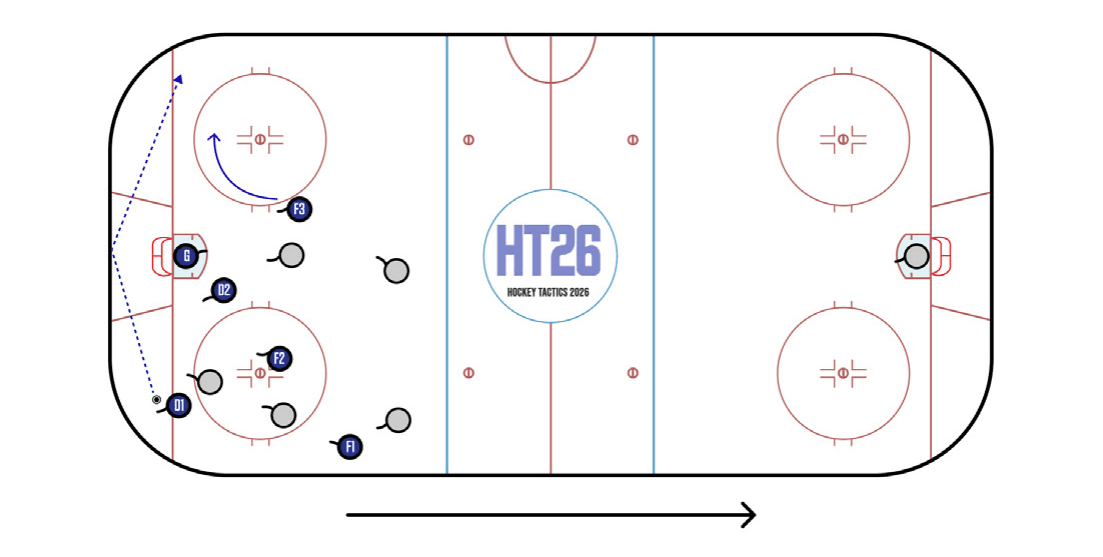
The Weak-Side Rim is an effective play against heavy forecheck pressure, since it bypasses multiple players with a single indirect pass. Effective defensemen use it judiciously, when the opposing forecheck has committed three skaters deep and when F3 is in position to skate onto the pass. Others default to it as a way to avoid having to make a more challenging, situationally appropriate, play.
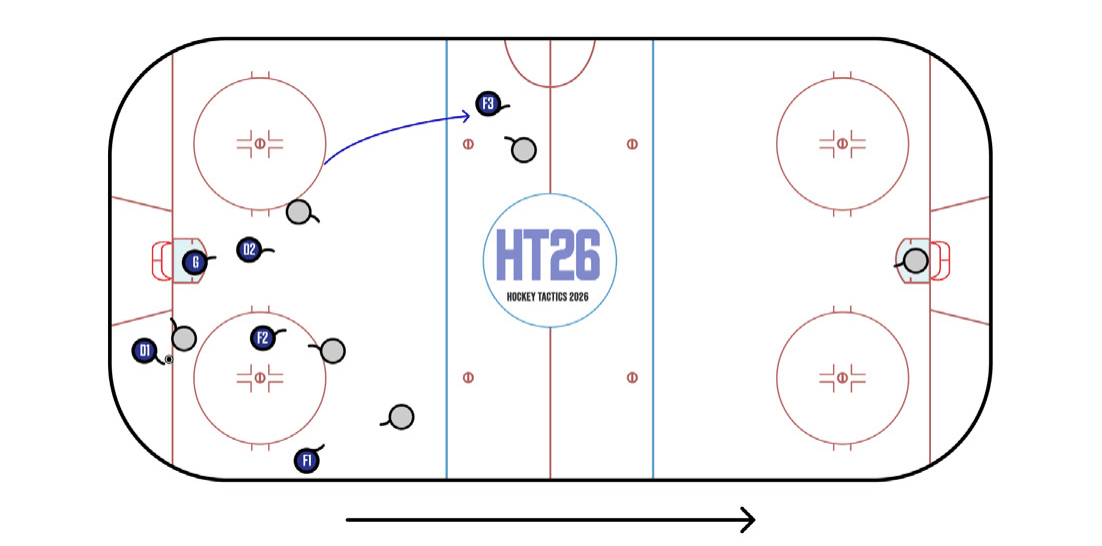
As the blue team regains possession, F3 pushes an opposing D behind the blue line to create a 4v4 in the defensive zone. This provides more space for the remaining players to generate an exit. Alternatively, F3 may drive between opposing Ds to force both into the neutral zone, which produces a valuable 4v3 underneath.
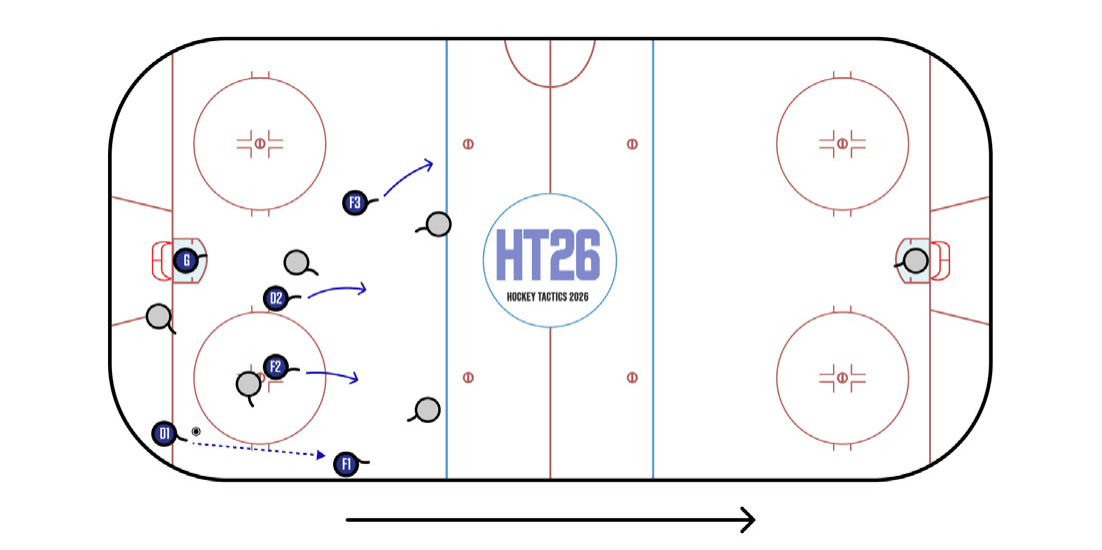
Weak-Side Winger Wide is a popular alternative to the Strong-Side breakout. F3, the weak-side player, attacks the open space to draw a defenseman away from the middle. D2, the netfront defenseman, sprints to fill the vacated lane. A quick up to F1 yields multiple change-of-side options in transition.